There is so much happening in the Stampin’ Up! world this week…
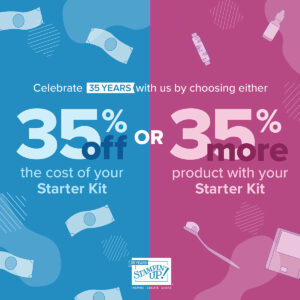
Join Promotion for 35% off your starter kit or 35% more product included in kit.
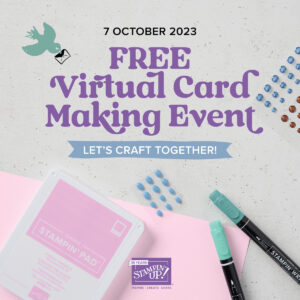
World Card Making Day Virtual Event this Saturday. (There is still time to register!)
October Paper Pumpkin still available-order today.
This weeks Translucent Florals card is soft, subtle, and expresses your feelings of support. Head to your craft table, gather your supplies, and let’s create!
The colors I have used for today’s card include:
PREP THE CARD
Measure out enough white bakers twine to wrap around the Basic White mat 3 times. Color it with the Lemon Lolly Stampin’ Blends and set aside to dry.
Stamp the 4 flowers on Basic White scrap–1 in Lemon Lolly and 2 in Bubble Bath.
Stamp 3 sets of leaves on Basic White scrap in Soft Sea Foam.
Stamp the exterior sentiment on Basic White scrap.
Stampin’ Cut & Emboss Work ~ Position and secure the coordinating dies to the flowers and leaves then run them through the SCEM. ~ Position and secure the Deckled Rectangle die on the Pool Party mat. ~ Insert the Pool Party mat into the Fern 3D EF and run through the SCEM.
ASSEMBLE CARD
Adhere the embossed Pool Party mat to the Basic White mat.
Wrap the bakers twine approximately 1 1/2″ from the bottom of the combined mat.
Dry fit the floral bunch on the Pool Party mat. ~ Arrange on set of leaves to hold the Lemon Lolly flower.
Cut off the leaves that will be covered by the lower flowers, these can be used elsewhere.
Position the Bubble Bath flowers as you did above. It will be necessary to cut the leaves apart to stylize the arrangement.
Once satisfied with arrangement, carefully flip layout over, adhere together with Tear & Tape, and then add dimensionals.
Adhere to mat.
Add the sentiment to the card making sure it is centered over the Bakers Twine.
EMBELLISH
Add 3 Berry Burst sequines from the Adhesive-backed Sequins Trio.
(The dies will not fit the paper size because the whole die cut is not being used, so please note the placement of pieces in the image above when die cutting.)
Stampin
ASSEMBLE THE INSIDE
Arrange and adhere the remaining flower and 2 leaves in the lower left corner of the Basic White mat.
Adhere the Basic White mat to the inside of the card base.
Don’t forget to decorate the envelope!
The fun of receiving snail mail begins with the envelope.
I decorated this envelope by stamping the flower in Bubble Bath in both corners of the bottom front of the envelope. I added a Lemon Lolly flower above and overlapping the flower in the left corner. Then I stamped the flower on the envelope flap.
Other ways to decorate an envelope include:
Dry emboss the envelope flap.
Stamped the envelope flap, along the left edge, or across the bottom.
Adhere DSP along the front left edge and/or across the bottom.
Die Cut a label out of DSP large enough to adhere a mailing label of the addressee on it and still see the design of the DSP peaking out around the edges of the mailing label.
MEASUREMENTS
Card Base, Soft Sea Foam 4 1/4″ x 11″ score @ 5 1/2″ (29.5cm x 10.4cm score @ 14.6cm)
Pool Party 3 7/8″ x 5 1/4″ (9.8cm x 14.2cm)
Basic White 2 – 4″ x 5 1/4″ (10.1cm x 14.2cm) Scrap
SEPTEMBER'S FREE TUTORIAL
Place a $50 order with me by Saturday, September 30th and receive this month’s Inspirations In Ink Tutorial containing 4 projects, using the the Translucent Florals Bundle, designed by talented Stampin’ Up! Demonstrators world-wide.
-PLUS-
Receive one of my customer Thank you cards with a PDF so you can create it yourself.
HAPPENING THIS WEEK
Don’t miss the big event this Saturday. Register Now!
Join my team of Stamping Muses today!
From 3–31 October, you can choose one of the two options for your Starter Kit when you sign up as a new Stampin’ Up! Demonstrator.
Either option include free shipping and free business supplies—not to mention all the fun that comes with being a part of Stampin’ Up! And, by signing up for this offer, you’ll even receive free registration to our online OnStage event this November! (A $77 value!)


")


