Cheerful Basket
Kitty of Happiness Card
Materials & Measurements
Stamps
Cheerful Basket
Dies, Punches,
Embossing Folders
Full Basket Dies
Layering Circle Dies
Cardstock
Basic Black (Card base 4 ¼”w x 11”h, score at 5 ½”)
Flirty Flamingo (Mat #1, 4”x 5 ¼”)
Basic Gray (Sentiment Strip 3 ¾”w x ¾”h; Scrap)
Basic White (Interior Mat 4″w x 5 1/4″h)
DPS
Perfectly Penciled (Mat #2, 3 ¾”w x 5”h; Envelope Flap 6”w x 2 ¼”h)
In Color Brights-Flirty Flamingo (Scrap)
Ink
Memnto Tuxedo Black
Blends
Flirty Flamingo
Parakeet Party
Embellishments
2021-2023 In Color Opal Rounds
Envelope
Basic White, (Decorate your envelope! The joy of receiving snail mail begins with the envelope.)
Other Supplies
Clear Blocks D & H
Stampin’ Up! Paper Trimmer
Stamp Cut and Emboss Machine (SCEM)
Take Your Pick Tool
Bone Folder
Scissors
Grid/Scrap paper
Stampin’ Pierce Mat
Silicone Craft Sheet
Simply Shammy
Adhesives (Tombow Liquid Glue, Stampin’ Seal, Stampin’ Seal+, Tear & Tape, Dimensionals, Glue Dots)
Directions
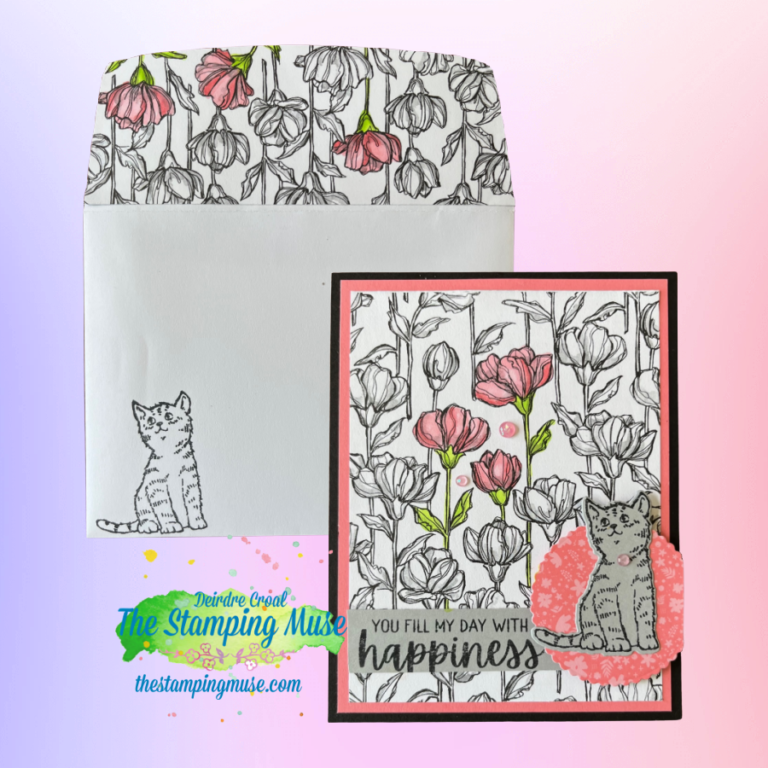
This card is built vertically. Use photo above for reference any time you have questions about dies used or placement of stamping or die cuts. (Images further explaining the process are included in the instructions. However, the DSP may be different than that used in the photo of the completed card, so always refer to the photo above for layout guidance.)
1. Cut card bases and mats as listed in the Materials & Measurements Section.
2. Stamp sentiment on Basic Gray strip and kitty on Basic Gray scrap, interior mat, and front lower left corner of the envelope.
3. Secure Full Basket kitty die to the stamped image. Secure the scalloped Layering Circle die #7 (2nd smallest scalloped die) to the 2021-2023 Flirty Flamingo DSP. Run through the SCEM.
Adhere the die cut kitty to the Flirty Flamingo die cut circle. Place dimensionals on back of the scalloped circle.
4. Color 3 flowers on the Perfectly penciled DSP with Flirty Flamingo and Parakeet Party Stampin’ Blend. (Be sure the colored flowers surround the focal image.)
5. Adhere the Perfectly Penciled mat to the Flirty Flamingo mat. Adhere the double mat to the card base. Adhere the sentiment strip near the bottom of the Perfectly Penciled DSP. Adhere the focal image. Trim off any off the focal image to make it flush with the card.
6. Embellish! Using 2021-2023 In Color Opal Rounds in Polished Pink, add 1 small opal to the neck of the kitty and place 2 within the Perfectly Penciled colored flowers.
Don’t forget to decorate the envelope! The joy of receiving snail mail begins with the envelope.
Adhere the envelope flap DSP to envelop flap. Trim around flap to remove excess. (Note: I always place paper 1/16” – 1/8” below the flap score line. This will ensure that the flap fold over nicely and the envelope seal appropriately.) Stamp a kitty on the front of the envelope in the lower left corner.


