The Stamping Muse

Stampin’ Up! Winter Owls Bundle
Warm Wishes Card

Stampin’ Up! Winter Owls Bundle is meant to send beautiful message to your loved ones delivered by these beautiful messengers of the night.

It is interesting to know that owls are a bird that symbolizes many different things in different cultures. In some they represent good luck, wealth, independence, protection, supernatural powers, courage, and intuition, while in others they represent gate keepers between worlds, death, and rebirth.

Whatever owls mean to you, creating cards with this set may be very auspicious for the recipient.

Don’t forget, the Stampin’ Up! Virtual World Card Making Day event is happening this Saturday. If you haven’t registered and you want to participate click on the image below.

Let’s take a look at the Winter Owl Bundle.

This bundle is filled with 3 multipurpose sentiments and, as you can see, various versions of the owl that can be stamped and/or die cut and plenty of accessories to create lovely cards. This set will make great masculine cards!

Prepare the card:

  1. Cut all the piece as listed in the measurements below.
  2. Stamp the exterior sentiment on the Very Vanilla scrap and the interior sentiment and image on the Very Vanilla mat. Adhere the Very Vanilla mat to the inside of the card base.
  3. Die cut the tree trunk out of the Early Espresso scrap, or if you want to save paper, out of the center of the Early Espresso mat. Die cut the owl our of Very Vanilla scrap.
  4. Insert the Misty Moonlight mat into the Quatrefoil Tile Embossing folder and run it through the SCEM (Stampin’ Cut and Emboss Machine).

Assemble the card:

  1. Adhere the interior mat to the inside of the card base.
  2. Adhere the Misty Moonlight mat to the Early Espresso mat.
  3. Adding strips of Tear & Tape, approximately 1 1/2″ long, to both sides on the back of the Early Espresso mat approximately 1″ from the bottom of the Early Espresso mat.
  4. Wrap a piece of Natural Ribbon around the front of the compiled mat and adhere it to the Tear & Tape on the back of the mat.
  5. Adhere the Vellum moon in the upper right corner of the Misty Moonlight mat.
  6. Add dimensionals to the back of the tree trunk, with the middle hole intact, and adhere to the left side of the Misty Moonlight mat.
  7. Determine placement of the owl. Add dimensionals in areas on the back of the owl that won’t be in contact with the tree trunk. Make sure to leave some room at the tip of the owls bottom  wing to slip the sentiment under Add liquid glue to the areas of the owl that will be in contact with the tree trunk. Adhere to the mat.
  8. Add dimensionals to the back of the sentiment, slip under the tip of the owls wind, center from top to bottom on the ribbon, and adhere toward the left side of the mat.
  9. Add 1 Pecan Pie Opaque Oval to the tree hole and 3 Blueberry Bushel Tinsel Gems  to complete the card.

Don't forget to decorate the envelope!

The envelope is the where the excitement of receiving
snail mail begins.

The envelope is decorated very simply, a single owl stamped in the lower right corner on front of the envelope.

A list of the products I used to create this card can be found at the end of this post.
Let me know if you have questions.

MEASUREMENTS

IMPERIAL
Crumb Cake
     8 1/2″ x 5 1/2″ score @ 4 d1/4″

Early Espresso
     4″ x 5 1/4″
     Scrap

Misty Moonlight
     3 3/4″ x 5″

Vellum
     Scrap

Very Vanilla
     4″ x 5 1/4″
     Scrap

METRIC
Crumb Cake
     20.9cm x 14.6cm score @ 10.4

Early Espresso
     10.1cm x 14.2cm
     Scrap

Misty Moonlight
     9.8cm x 13.9cm

Vellum
     Scrap

Very Vanilla
     10.1 cm x 14.2cm
     Scrap   

OCTOBER'S FREE TUTORIAL

Place a $50 order with me by Tuesday, October 31st and receive this month’s Inspirations In Ink Tutorial featuring
 5 projects created with the Translucent Florals Bundle designed by talented Stampin’ Up! Demonstrators
world-wide.

-PLUS-

Receive one of my customer Thank you cards with a PDF so you can create it yourself.

HAPPENING THIS WEEK

Join in on the fun this Saturday!
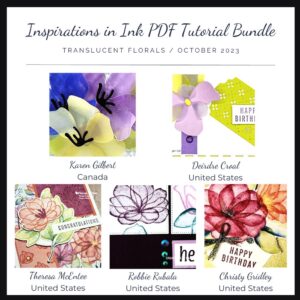
Click on the image to register.
Click image to see what's included in this kit!

PRODUCTS NEEDED

SUPPLIES TO GATHER

Leave a Reply

Your email address will not be published. Required fields are marked *