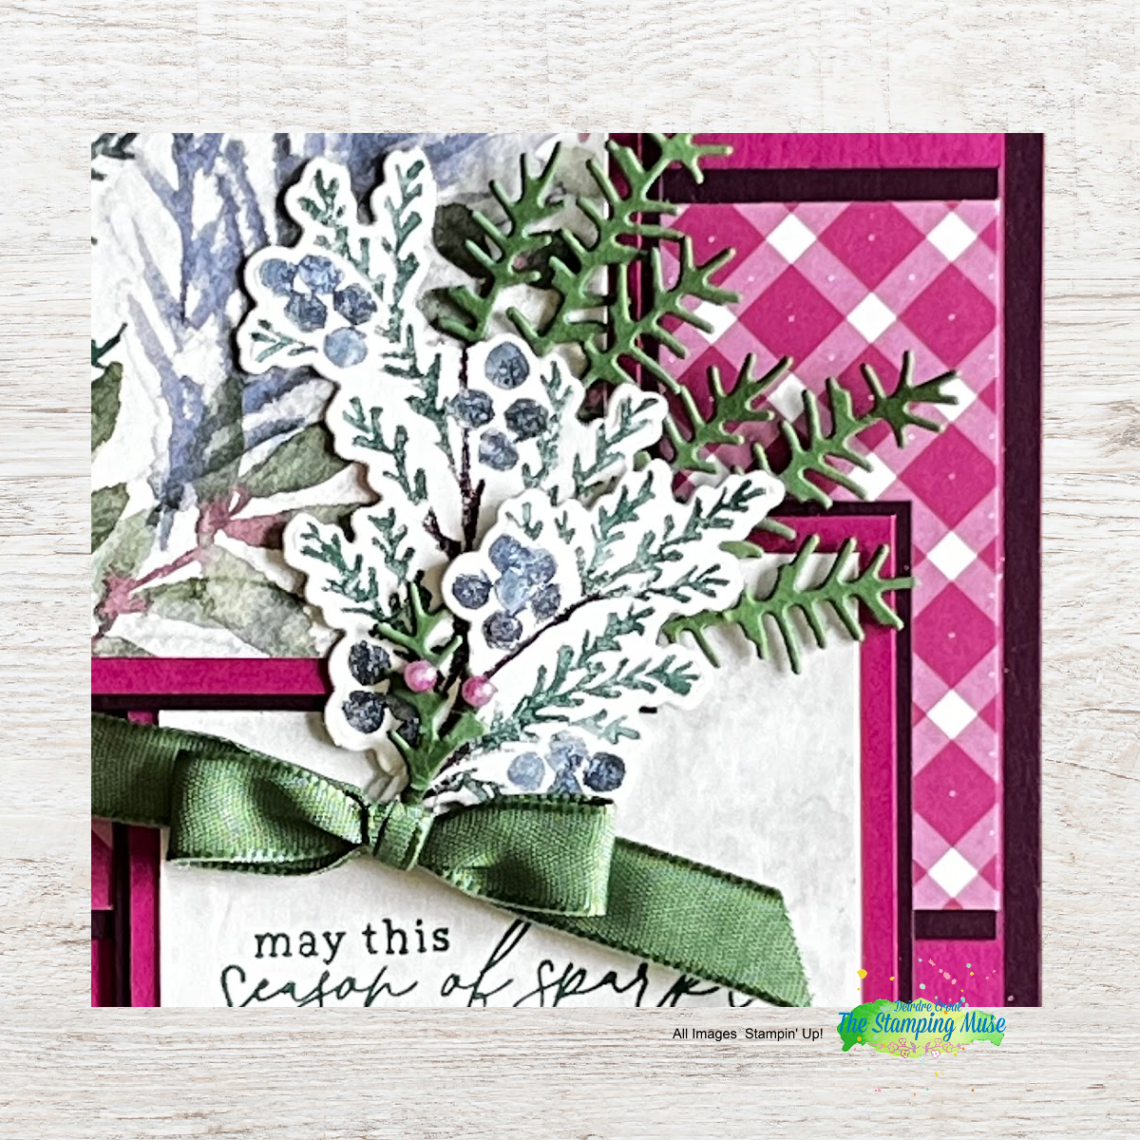
Welcome to the October 2023 Inspirations in Ink Blog Hop featuring Stampin’ Up!’s Winter Meadow Suite (Magical Meadow Bundle). I hope you will enjoy and create Bright & Merry I have for you today.
Thank you for visiting my page. The Inspirations In Ink team is a group of Stampin’ Up! Demonstrators world-wide who have banned together to provide you with inspiration for creating handmade cards.
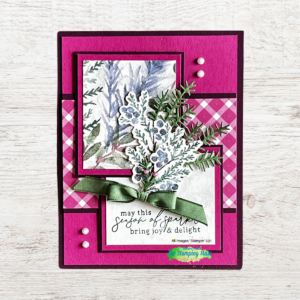
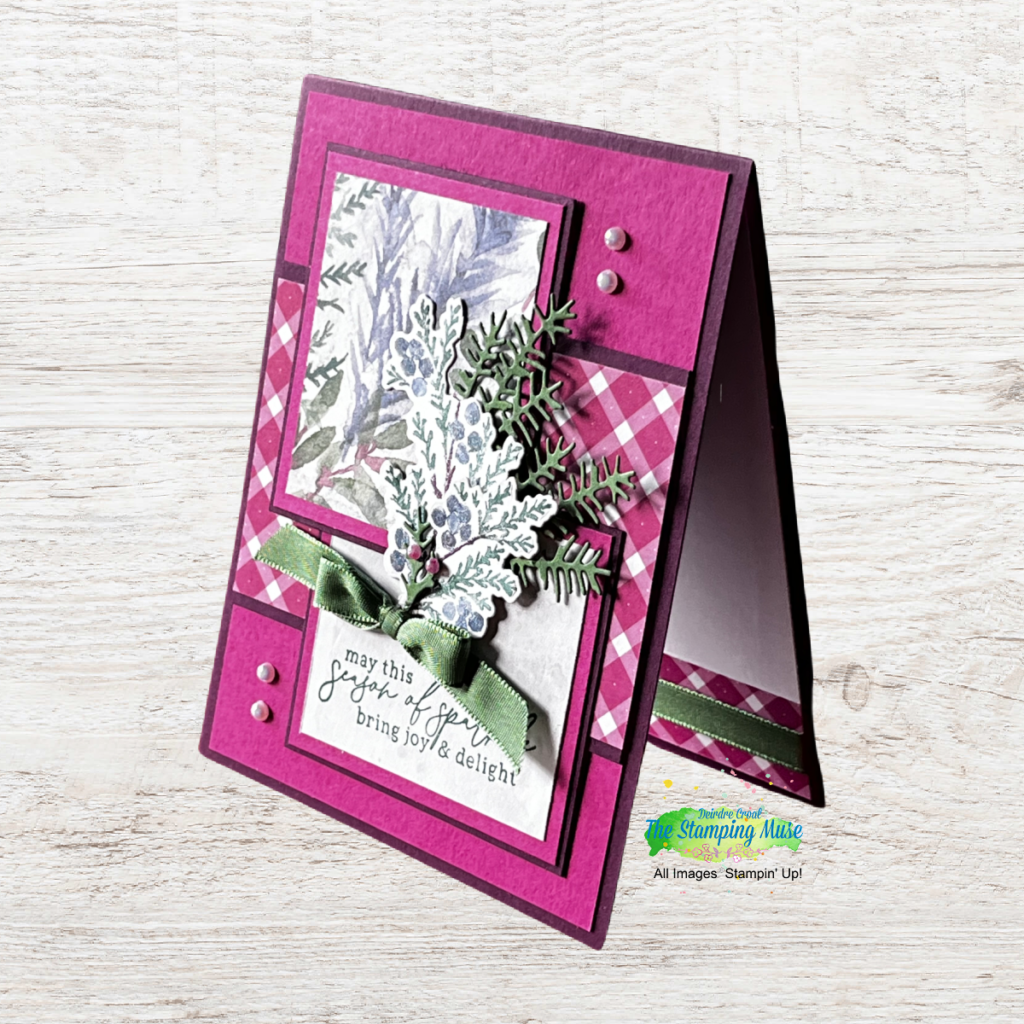
I am in the process of creating my Christmas cards and fell in love with imagery in the Winter Meadow Suite. I had 3 criteria I wanted to meet in designing today’s card:
A versatile layout
A card with bright colors.
Easy to reproduce.
I believe I accomplished all of them.
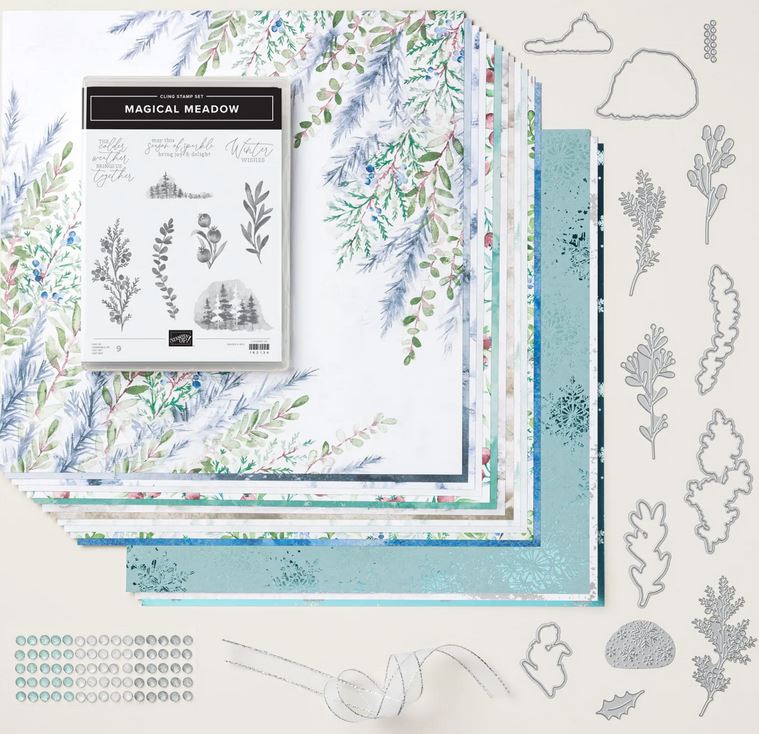
The Winter Meadow Suite includes the Magical Meadow Bundle, Winter Meadow DSP, Snowflake Magic Specialty Paper, Silver & White 1/2″ Ribbon, and Faceted Gems Trio Pack.
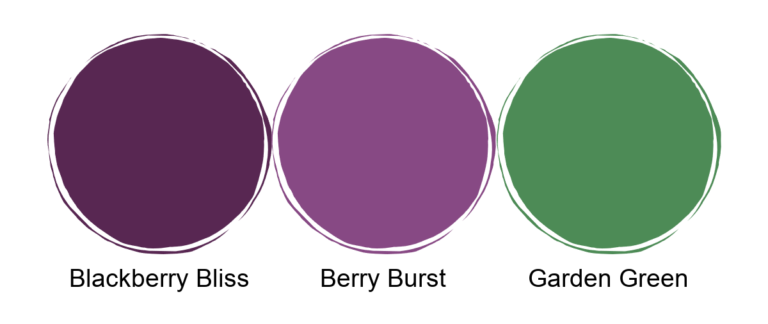
Color Palette
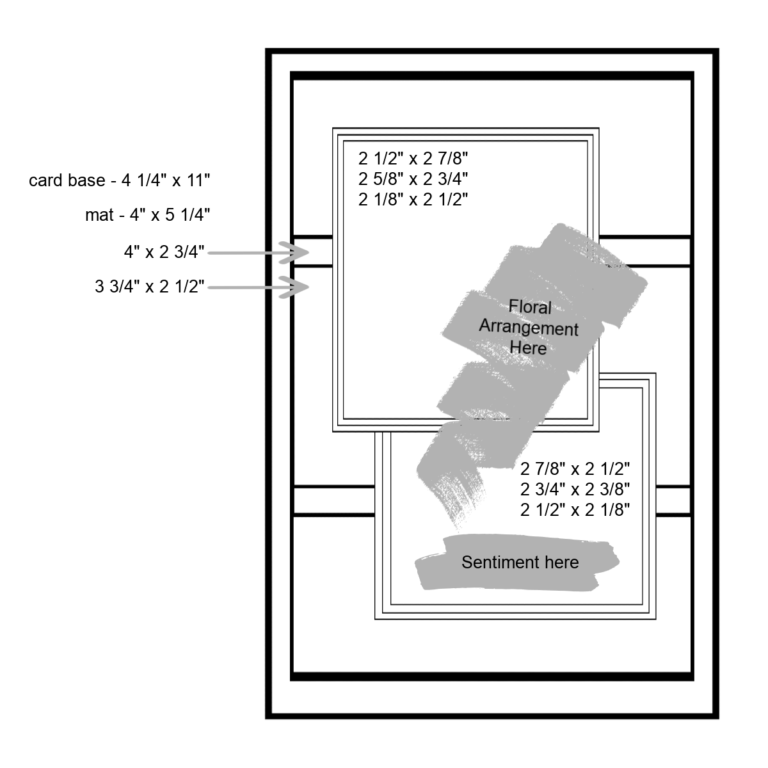
Card Layout
The directions to create this card are listed below. Enjoy!
Front
Cut all the pieces according to measurements listed below.
Lay the grey modeled piece of DSP vertically and stamp the exterior sentiment from the Magical Meadow stamp set in Garden Green ink toward the bottom edge of the DSP as shown in layout.
Stamp the interior sentiment in Garden Green ink on the Basic White mat.
Color the berry branch stamp using Stampin’ Write Markers: Berries in Blueberry Bushel, branch in Blackberry Bliss, and greenery in Garden Green. Huff on the stamp to activate any ink that may have dried, then stamp the image on Basic White scrap.
Position and secure the coordinating die to the berry branch. Secure the evergreen die to Garden Green Scrap. Run through the SCEM. Repeat 1 more time with the evergreen die.
Adhere the small pieces of DSP to the coordinating Berry Burst mats, then adhere compiled mat to the coordinating Blackberry Bliss mats. Pay attention to direction of the layout.
Adhere the Berry Burst Glorious Gingham DSP to the coordinating Blackberry Bliss mat.
Center compiled mat vertically and adhere the larger Berry Burst mat.
Adhere the compiled mat to the card base.
Dry fit the sentiment mat, horizontally, so the top edge is centered on the Glorious Gingham DSP mat. Determine how much of the sentiment mat will hang over the bottom edge of the Gingham mat and onto the Berry Burst mat.
Cut and adhere a piece of Blackberry Bliss scrap to the back portion that hangs over the edge. Then add liquid glue and adhere the sentiment mat to the card base.
Dry fit the remaining focal mat, vertically, making sure the top Berry Burst border matches the bottom Berry Burst border. Determine where to add a piece of Blackberry Bliss scrap and adhere it to the back of the mat.
Adhere the focal mat to the card base with liquid glue.
Build the floral arrangement. Cut the berry branch into 2 pieces and dry fit them with the bottom edges positioned above the sentiment as shown in the above layout.
Tuck a sprig of greenery behind the berry branch and determine where to cut it apart. Arrange the cut pieces. Repeat this process with the remaining sprig.
When satisfied with the arrangement, carefully flip it over and tape it together. Adhere directly to the card base with liquid glue.
Tie a bow with Garden Green Ribbon, add a Glue Dot to the back, and adhere it at the base of the floral arrangement to hide the ends.
Color 3 small Iridescent Pearls with the dark Berry Burst Stampin’ Blends and adhere them to 3 berries above he bow.
Add 2 large Iridescent Pearls to the right of the top focal mat and 2 large Iridescent Pearls to the left of the sentiment mat.
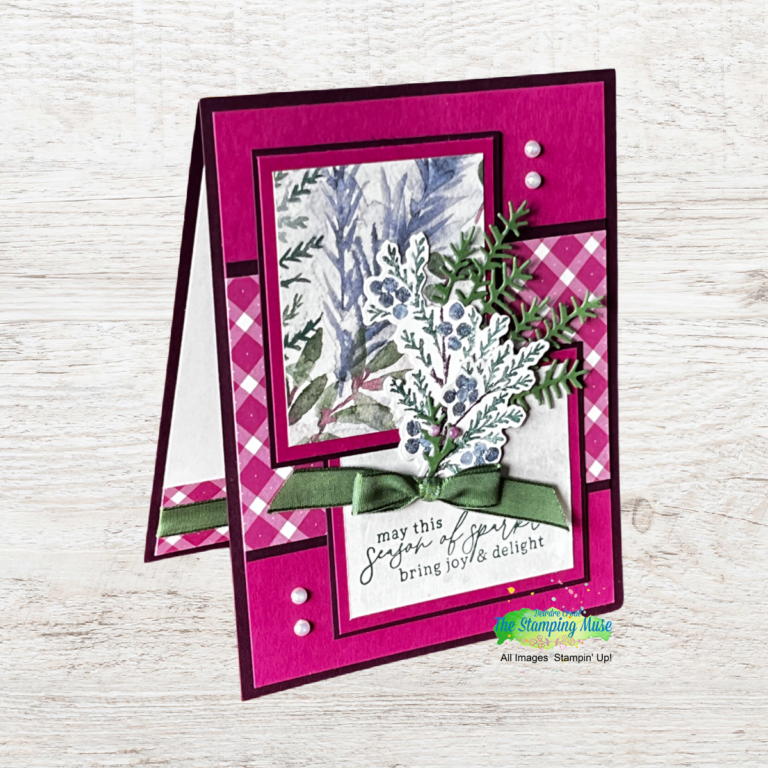
Inside
Adhere the strip of Berry Burst Glorious Gingham DSP along the bottom of the interior mat.
Flip the mat over and add Tear & Tape to the right and left edges at the bottom of the mat.
Center a piece of the Garden Green ribbon on the Glorious Gingham strip. Wrap it around the front of the mat and adhere it to the Tear & Tape on the back.
Adhere the mat to the inside of the card base.
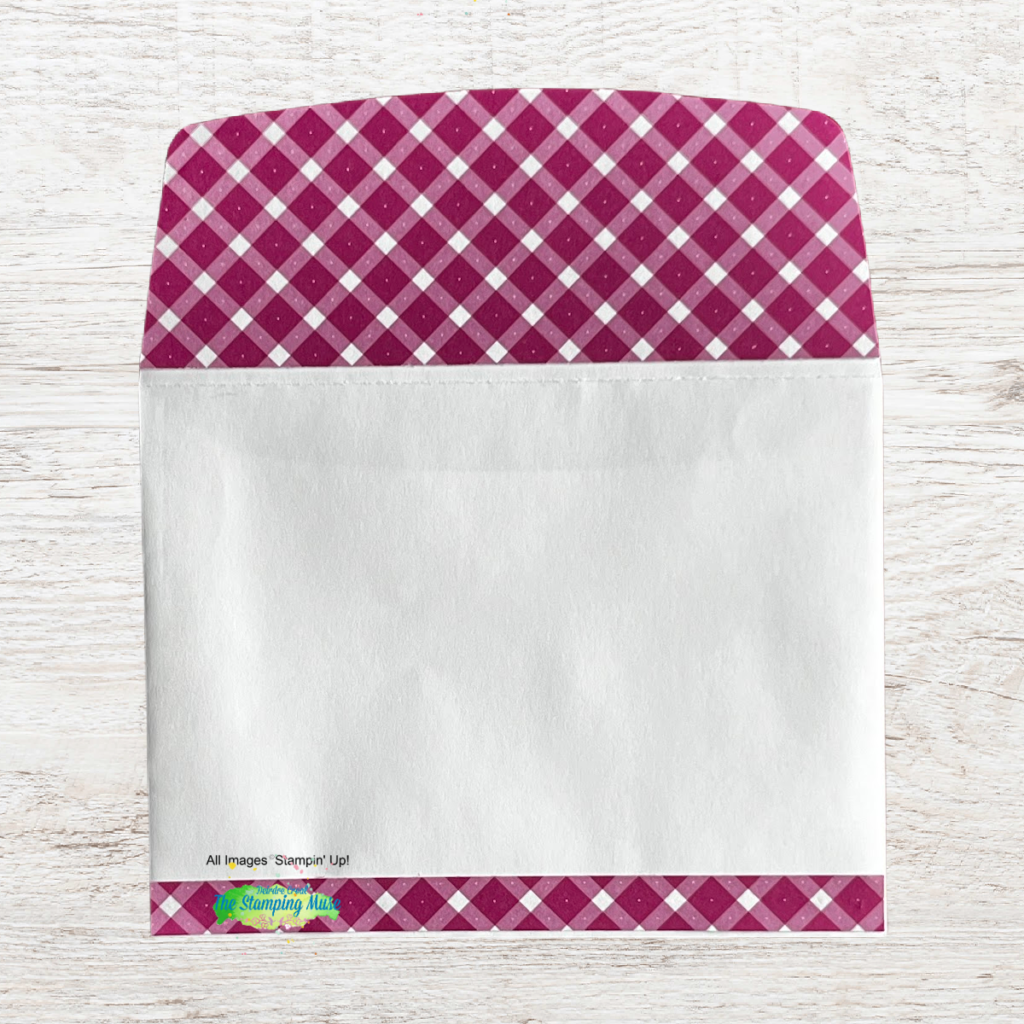
Don’t forget to decorate the envelope!
The fun of receiving snail mail begins with the envelope.
Decorated the envelope by adhering the 6″ x 2 1/4″ piece of coordinating Glorious Gingham DSP to the envelope flap and trim off the excess.
Add a 1/2″ strip of the same DSP along the front, bottom edge of the envelope.
HOP ALONG
You may be starting here or joining me from another participating team member’s page, either way, I hope you will continue on the hop by clicking on the Blog Roll at the end of this post. Don’t forget when visiting to leave them a little “love.” Please ask if you have any questions.
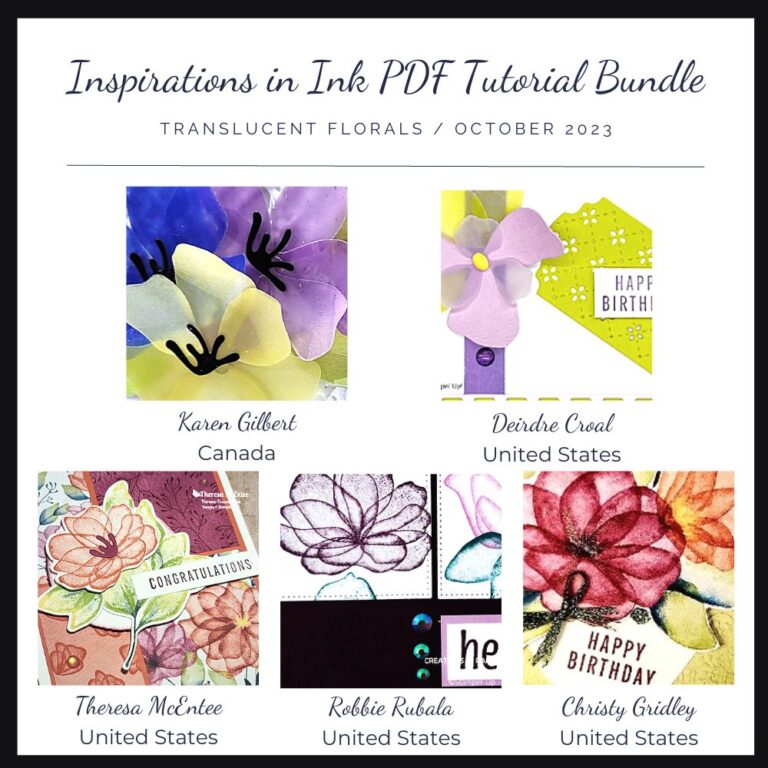
Place a $50 order with me by Tuesday, October 31st and receive this month’s Inspirations In Ink Tutorial containing 4 project using the Translucent Florals Bundle, designed by talented Stampin’ Up! Demonstrators world-wide.
-PLUS-
Receive one of my customer Thank you cards with a PDF so you can create it yourself.
NOVEMBER BUNDLE FOCUS Winter Meadow Suite – Magical Meadow Bundle
Starting November 1st, Inspiration In Ink Tutorial Bundle will focus on projects using the Winter Meadow Suite (Magical Bundle) and it is yours for FREE by placing a $50 order during the month of August!
The November Paper Pumpkin presents the Home For The Holidays. It is filled with hand painted watercolor florals that are meant to spread hope, encouragement, and remind you of your favorite memories.
A FREE Distinktive Stamp Set is included if you subscribe by August 10. Don’t wait, order yours today!


")
")
 Designer Series Paper")
 Designer Series Paper")


 Ribbon Combo Pack")


2 Comments
Karen D Gilbert
Beautiful card Dierdre. Love the colours and the layout
Christy Gridley
So Beautiful Dierdre!! Love the colors & layout!! Love the addition of the ribbon on the inside!!