Card #2 using the Fresh As A Daisy Suite also focuses on creating cards using the DSP. I was not sold on the DSP initially because it uses the 2023-2025 In Colors as its color base and I just couldn’t see them working well with the theme of this Suite, but once again I was proven wrong.
Don’t forget to check out all that is going on with Stampin’ Up! this week. All can be found following the card instructions.
I hope you will create this simple Fresh As A Daisy DSP card. If you do, please share your creation in the comments below. Enjoy!
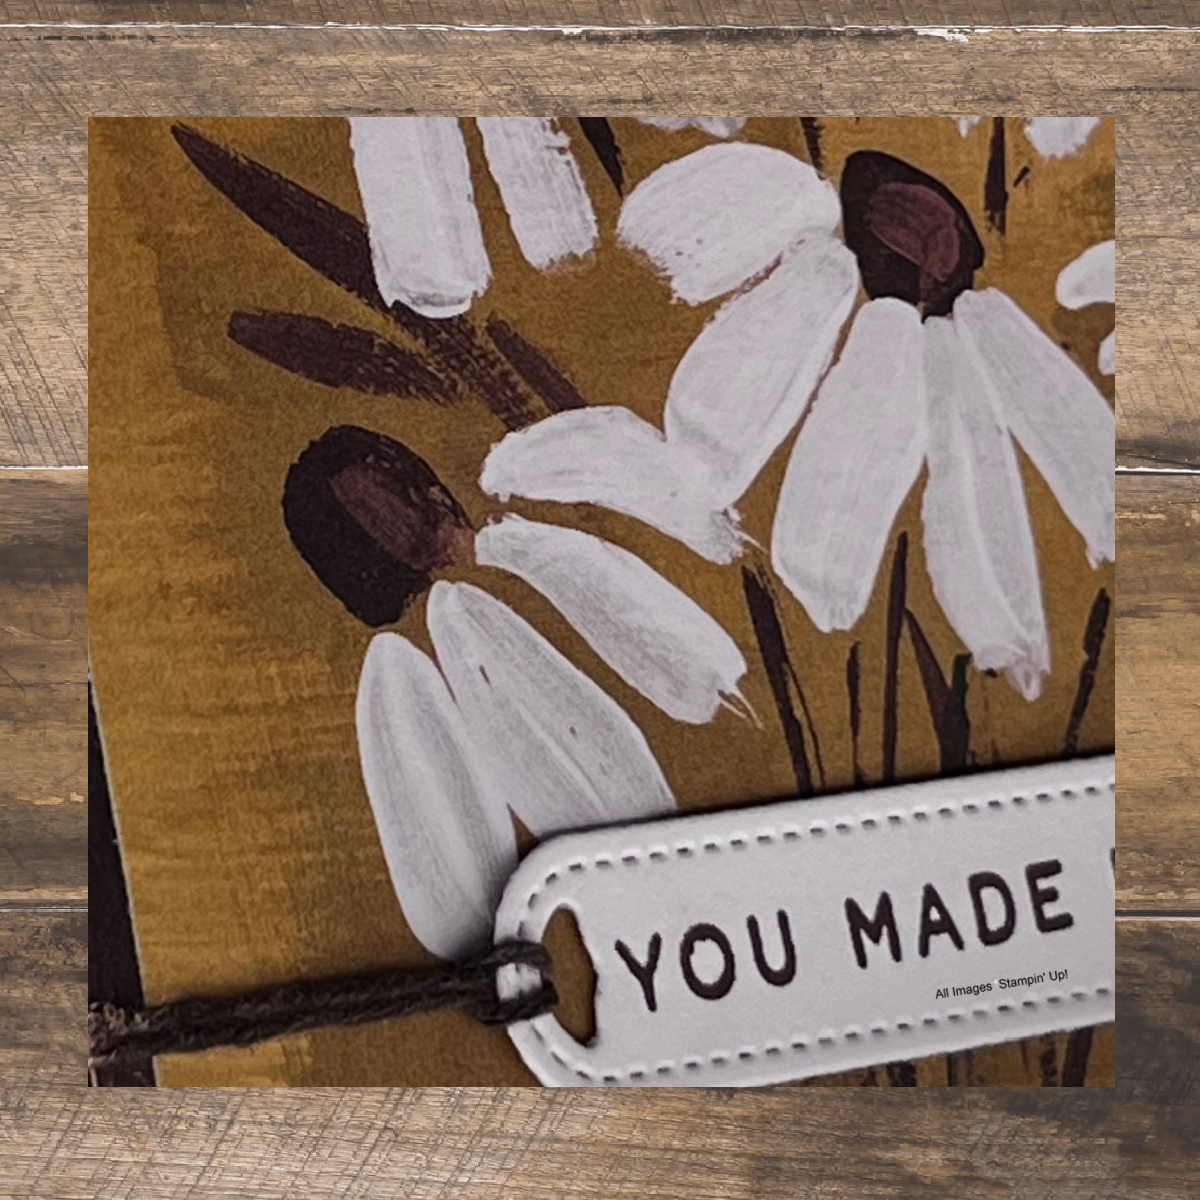
The above sheet of DSP is included in the Fresh As A Daisy DSP pack. The image blocks are meant to be cut apart and used to make quick and simple cards. This card was inspired by the colors of the cut out in the lower right corner of this sheet.
I choose Wild Wheat for the card base to pull out the background color of the image. I matted the image on a piece of Early Espresso to frame the image allowing it to pop off the card base.
Cut 2 – 4″ pieces of White Bakers Twine and color them with the SU 100 Stampin’ Blend. (SU 100 is part of the Deep combo pack of the Natural Tones Stampin’ Blends.) Set aside to dry.
Rub the Basic White interior mat with the Embossing Buddy. Stamp the half daisy 4 times along the left edge using VersaMark ink.
Sprinkle the stamped images with clear embossing powder. Tap off excess powder. Use a hard bristled brush to remove any unwanted powder that still remains.
Melt the powder with the Heat Tool until the stamped images are shiny. Don’t over heat the images or images and paper may burn.
Pick up Wild Wheat ink with a clean/color appropriate Blending Brush. Starting off the paper, lightly rub the brush over the left edge of the mat highlighting the stamped daisies. Continue this process until satisfied with the color depth.
Wipe ink off the embossed image.
Stamp the daisy centers in Early Espresso ink.
Stamp the exterior sentiment on Basic White scrap and the interior sentiment on the the interior mat using Early Espresso ink.
Using the Waves Dies, position and secure the smallest label die around the exterior sentiment and run through the SCEM.
ASSEMBLE THE FRONT
Fold a piece of the Bakers Twine in half and thread the looped end through one end of the exterior label. The thread the two loose end through the loop and pull to tighten so it fits tightly to the label edge. Repeat this process on the other side of the label.
Flip over the DSP mat and add 1″ of Tear & Tape to both side of the DSP mat edges.
Flip mat over again and adhere the label to the card base with a single Glue Dot. Wrap the Bakers Twine around the DSP edges and adhere to Tear & Tape on the back.
Adhere the DSP mat to the Early Espresso mat. Adhere complied mat to Wild Wheat card base.
EMBELLISH
Add 3 Brushed Metallic Dots to the centers of 3 daisies.
Add 1 large Brushed Brass Butterflies toward the top of the mat and 2 small butterflies on or near the label in the bottom right corner of the mat.
Color a few daisies with Wink of Stella.
ASSEMBLE THE INSIDE
Fold a piece of the Bakers Twine in half and thread the looped end through one end of the exterior label. The thread the two loose end through the loop and pull to tighten so it fits tightly to the label edge. Repeat this process on the other side.
Flip over the DSP mat and add 1″ of Tear & Tape to both side of the DSP mat edges. Flip mat over again and adhere the label to the card base with a single Glue Dot. Wrap the Bakers Twine around the DSP edges and adhere to Tear & Tape on the back.
Adhere the DSP mat to the Early Espresso mat. Adhere complied mat to Wild Wheat card base.
Don’t forget to decorate the envelope!
The fun of receiving snail mail begins with the envelope.
I decorated this envelope by adding a piece of matching DSP to the flap. I then repeat the same technique that I used for the stamped images inside the card on the front lower left corner of the envelope.
Other ways to decorate an envelope include:
Dry emboss the envelope flap.
Stamped the envelope flap, along the left edge or across the bottom.
Adhere DSP along the front left edge and/or across the bottom.
Die Cut a label out of DSP large enough to adhere a mailing label of the addressee on it and still see the design of the DSP peaking out around the edges of the mailing label.
JULY'S FREE TUTORIAL
Place a $50 order with me by Monday, July 31st and receive this month’s Inspirations In Ink Tutorial containing 7 project using the Fresh As A Daisy Suite (Cheerful Daisies Bundle) and are designed by talented Stampin’ Up! Demonstrators world-wide.
-PLUS-
Receive one of my customer Thank you cards with a PDF so you can create it yourself.
Paper Pumpkin Kits come with everything you need to make 9 cards for your loved ones.
The unique accordion fold element of this month’s card kit brings a playful and happy vibe that everybody is sure to love, so take your crafting to the next level with these fun, summer-theme accordion folds!


")


")


